Does your makeup sit in fine lines you didn’t know you had? That’s not your skin’s fault. It’s the technique.
After 40, skin changes. It produces less oil, loses collagen, and texture shifts. The same powder you used at 30 now settles into creases you never saw before. The foundation that looked flawless in your 20s now feels heavy and cakey.
I spent a weekend digging into what actually works for mature skin — not marketing hype, but what makeup artists and dermatologists agree on. Here are the seven mistakes that age you, and exactly how to fix each one.
1. The “More Coverage” Trap — Why Heavy Foundation Backfires
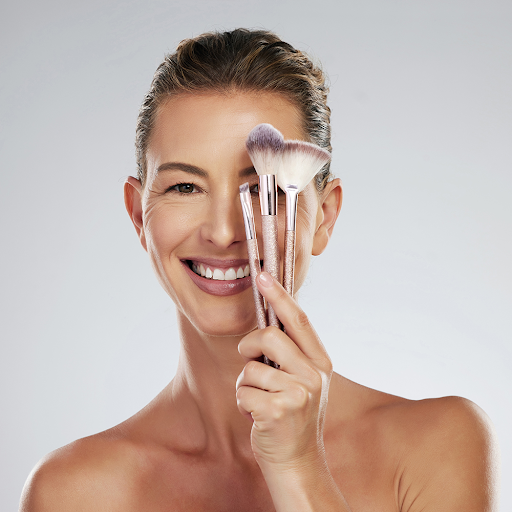
This is the number one mistake I see. Women think they need more coverage to hide wrinkles, age spots, or redness. So they reach for a full-coverage matte foundation. And it makes everything worse.
Here’s why: heavy foundation sits on top of the skin. It doesn’t sink in. On mature skin, which has lost some natural plumpness, that layer of pigment highlights every ridge and hollow. The result is a mask-like finish that looks dry and cakey by noon.
Thick matte formulas are particularly bad. They contain more talc and silica to absorb oil, but mature skin doesn’t have excess oil to absorb. The powder particles settle into fine lines and make them look deeper.
What works instead: a sheer to medium coverage foundation with a luminous finish. The goal is to even out skin tone, not hide everything. Let some natural skin texture show through — that’s what looks youthful.
What to look for in a foundation formula
Skip anything labeled “matte,” “full coverage,” or “long-wear 24 hour.” Those are red flags for mature skin. Instead, look for:
- “Hydrating” or “dewy” finish
- Hyaluronic acid or glycerin in the first five ingredients
- Light-reflecting particles (not glitter — subtle mica)
- SPF 15 or higher (bonus, not primary)
Two specific products that work well: Laura Mercier Tinted Moisturizer Natural Skin Perfector ($48) gives light coverage with a skin-like finish. Ilia Super Serum Skin Tint SPF 40 ($48) combines skincare with tint — it has niacinamide and squalane, so it hydrates while it covers. Both are thin enough to move with your skin, not crack on top of it.
2. Powder Application — Less Is Actually More
Powder is not your enemy. But how you apply it matters enormously.
The instinct is to dust powder all over your face to “set” everything. That works for oily skin. For mature skin, it’s a disaster. Powder settles into every line, every crease, every dry patch. By the end of the day, your makeup looks cracked.
Here’s the fix: only powder where you absolutely need it. That’s usually the T-zone — forehead, nose, chin. Skip the cheeks, under-eyes, and smile lines. Those areas need to stay hydrated and flexible.
Which powder to use
A translucent, finely-milled loose powder is better than pressed powder. Pressed powders have more binder, which means more texture. Kosas Cloud Set Baked Setting Powder ($34) is a good option — it’s silky and doesn’t look dry. Laura Mercier Translucent Loose Setting Powder ($44) is the industry standard for a reason: it’s micronized so fine it almost disappears.
Application tool matters too. A fluffy powder brush picks up less product than a puff. Tap off excess before applying. Use a pressing motion, not a sweeping motion — sweeping drags the skin and disturbs the foundation underneath.
3. The Shimmer Shadow Problem — Why Glitter Ages You
This is the one that surprises most women. Shimmery eyeshadow seems like it would make you look more awake. But on mature eyelids, it does the opposite.
Eyelid skin is the thinnest skin on your body. As you age, it loses elasticity and can develop crepey texture. Shimmer particles catch the light and magnify that texture. Instead of looking smooth and bright, your eyelids look bumpy and uneven.
Matte or satin shadows are better. They diffuse light instead of reflecting it. The trick is to use a matte shadow that’s one shade darker than your skin tone in the crease, and a satin (not shimmer) shade on the lid. Satin has a subtle sheen — it reflects light softly without emphasizing texture.
What about the inner corner highlight? Skip shimmer there too. Use a matte cream or peach shade to brighten the inner corner. Bobbi Brown Long-Wear Cream Shadow Stick in “Bone” ($36) is a matte cream that works perfectly for this. It stays put for hours.
One shimmer exception
If you genuinely love shimmer, use it strategically. A tiny amount of a finely-milled shimmer pressed into the center of the eyelid (not the inner corner or brow bone) can look beautiful. Charlotte Tilbury Eyes to Mesmerise in “Rose Gold” ($34) has a cream-gel formula that melts into the skin instead of sitting on top. Apply with your ring finger and tap, don’t rub.
4. Brows That Are Too Dark or Too Sharp
As you age, brows naturally thin. The instinct is to fill them in aggressively to get back the fullness you had. But a dark, sharply-drawn brow looks harsh and unnatural. It draws attention to the eyes in a way that ages you.
Your brows should be one to two shades lighter than your natural hair color. A dark brunette should use a soft taupe or ash brown, not a deep chocolate. A blonde should use a soft blonde or light taupe, not a dark blonde.
The application technique matters more than the product. Use short, hair-like strokes in the direction of your natural brow growth. Don’t outline the brow shape — that’s what creates the sharp, drawn-on look. Focus on filling in sparse areas, not creating a new shape.
Best products for natural brows
A fine-tipped brow pencil gives you the most control. Anastasia Beverly Hills Brow Wiz ($25) has a micro-pencil tip that lets you draw individual hairs. Glossier Boy Brow ($18) is a tinted gel that thickens existing brow hairs without adding harsh color — it’s almost impossible to mess up.
If you have very little brow hair left, consider a powder instead of a pencil. Benefit Cosmetics Brow Zings ($36) is a powder and wax kit that lets you build soft, diffused color. The powder fills in patches without looking heavy.
5. Blush Placement — The Difference Between Lifted and Dragged
Blush placement is one of the fastest ways to change how your face looks. Put it in the wrong spot, and you drag your features down. Put it in the right spot, and you create a subtle lift.
The mistake: applying blush on the apples of the cheeks. That worked in your 20s. But as skin loses elasticity, the apples of the cheeks can sit lower than they used to. Blush there pulls the eye downward and makes your face look tired.
The fix: apply blush higher. Place it on the high points of your cheekbones, almost blending up toward your temples. This creates a lifted effect. It mimics the natural flush you get after exercise.
Use a cream or liquid blush instead of powder. Creams melt into the skin and look more natural. Rare Beauty Soft Pinch Liquid Blush ($23) is incredibly pigmented — one tiny dot per cheek is enough. Blend with your fingertips or a damp sponge. Jones Road Miracle Balm ($42) is a tinted balm that adds both color and glow. It’s almost foolproof.
What colors work best
Peach and rose tones flatter most mature skin. Avoid anything too cool-toned (like bright pink) or too dark (like deep berry). Those can look ashy or harsh. A soft peach or warm rose mimics a natural flush.
| Blush Type | Best For | Application Tool | Example Product |
|---|---|---|---|
| Cream | Dry or normal mature skin | Fingertips or damp sponge | Rare Beauty Soft Pinch Liquid Blush ($23) |
| Liquid | Normal to combination mature skin | Stippling brush | Jones Road Miracle Balm ($42) |
| Powder | Oily mature skin (rare) | Fluffy brush, light hand | NARS Blush in “Orgasm” ($32) |
6. Lip Liner That’s Too Dark — The 1990s Trap
Dark lip liner with a lighter lipstick in the middle is a look that hasn’t aged well. It makes lips look smaller and draws attention to lines around the mouth.
As you age, lips naturally lose volume and definition. The vertical lines around the mouth (smoker’s lines, even if you never smoked) become more noticeable. A dark liner emphasizes those lines because the contrast draws the eye.
Instead: use a lip liner that matches your natural lip color exactly. Not darker. Not lighter. Exactly. Fill in the entire lip with the liner, then apply a creamy lipstick or gloss on top. This creates a uniform base that blurs the edges of your lips.
Creamy formulas are non-negotiable. Matte lipsticks cling to dry patches and settle into lines. Charlotte Tilbury K.I.S.S.I.N.G Lipstick in “Pillow Talk” ($35) is a cult favorite for a reason — it’s creamy, slightly glossy, and universally flattering. Ilia Balmy Gloss Tinted Lip Oil ($28) is even more forgiving. It’s thin enough to move with your lips, not crack on top of them.
The lip balm trick
Before any lip product, apply a hydrating lip balm and let it sit for two minutes. Blot off the excess. Then apply your liner and lipstick. That layer of moisture prevents the color from settling into lines. Aquaphor Lip Repair ($5) works perfectly for this — it’s cheap and effective.
7. Skipping Primer — The One Step That Changes Everything
Primer is not a marketing gimmick. For mature skin, it’s the difference between makeup that lasts an hour and makeup that lasts all day.
The problem: mature skin has texture that foundation can’t fill on its own. Fine lines, enlarged pores, and dry patches all create an uneven surface. Primer fills those gaps and creates a smooth base. Without it, foundation settles into every imperfection.
But not all primers work. A mattifying primer (designed for oily skin) will make mature skin look dry and flaky. A pore-filling primer with silicone can pill or ball up under foundation.
What to look for: a hydrating, illuminating primer. It should have ingredients like glycerin, hyaluronic acid, or squalane. It should feel silky, not sticky. Apply it to damp skin after moisturizer, and let it sit for 60 seconds before putting on foundation.
Tatcha The Silk Canvas Protective Primer ($69) is expensive but effective — it’s a balm that transforms into a silky finish. e.l.f. Power Grip Primer ($10) is a solid budget option. It has a gel texture that grips foundation without drying out the skin. Both create a smooth base without looking heavy.
One more thing: if you wear sunscreen under makeup, let it dry completely before applying primer. Mixing sunscreen with primer dilutes both products and reduces their effectiveness.
Here’s what I recommend: for most women with mature skin, the Laura Mercier Tinted Moisturizer Natural Skin Perfector combined with the e.l.f. Power Grip Primer is the most reliable, affordable combination. The primer costs $10 and the tinted moisturizer costs $48. That’s $58 total for a base that looks natural, lasts all day, and doesn’t settle into lines. Skip the heavy foundation. Skip the all-over powder. Focus on hydration and placement. Your skin will do the rest.


